 Save
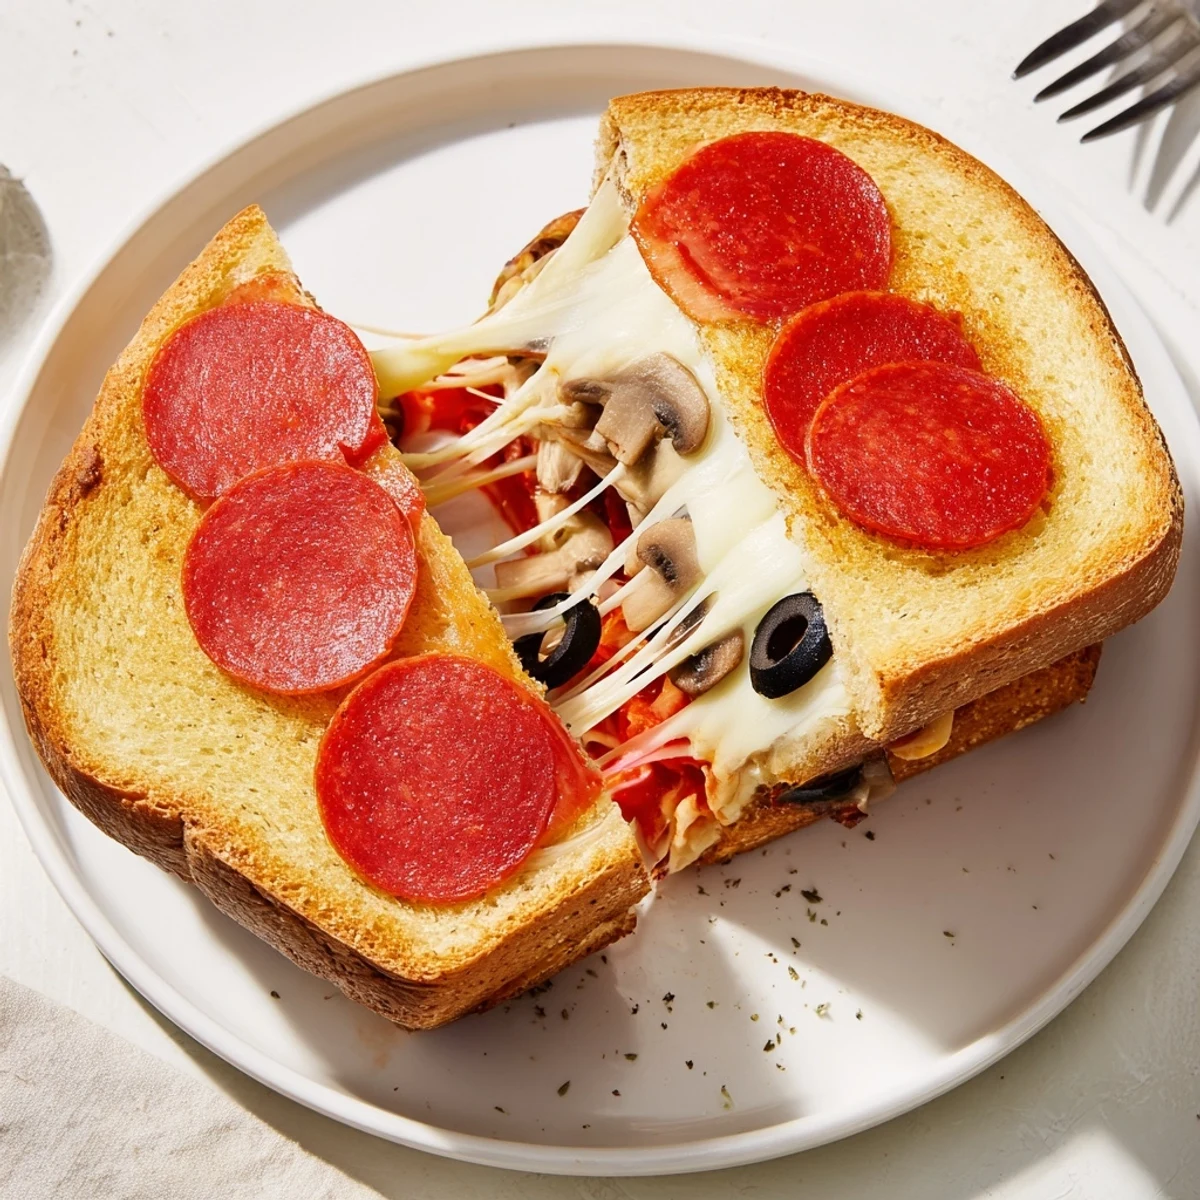
Save Assemble eight slices of sandwich bread with 2 tablespoons of pizza sauce and shredded mozzarella, add chosen toppings, butter the outer sides, close and place in a preheated pie iron. Cook over medium campfire heat about 3–4 minutes per side until the bread is golden and the cheese is fully melted; yields four handheld pockets in roughly 18 minutes.
Trim exposed edges before closing for a neat seal, brush with melted butter for a golden finish, and vary fillings with cooked sausage, fresh basil or pesto. Let cool slightly before serving and use gluten-free bread or alternate sauces to suit dietary needs.
Some meals just call for laughter and a hint of woodsmoke swirling through the air. The sizzle of a pie iron snapping shut over a campfire is unmistakably cheerful, promising a gooey, crisp reward in minutes. The first time I made pizza pockets outdoors, we all hovered a little too close, trying to catch the scent of melting cheese and toasting bread. It felt less like cooking and more like a team adventure, each person claiming their own favorite topping combination.
I remember once handing out carving sticks and napkins while we built our pizza pockets, the kids eyeing each topping like treasure. There was friendly arguing over olives versus mushrooms and plenty of sauce smudged on noses before we even closed the pie irons. Somehow, everything tasted even better hunched together by the fire, with fingers slightly butter-slick and everyone impatient for that first crisp, hot bite.
Ingredients
- Bread: Sturdy sandwich bread works best here since it crisps up beautifully and seals the fillings inside; whole wheat feels a bit heartier, but white brings that classic crunch.
- Pizza sauce: I learned to spread it right to the edges for flavor in every bite—marinara and pesto both work in a pinch if you're running low.
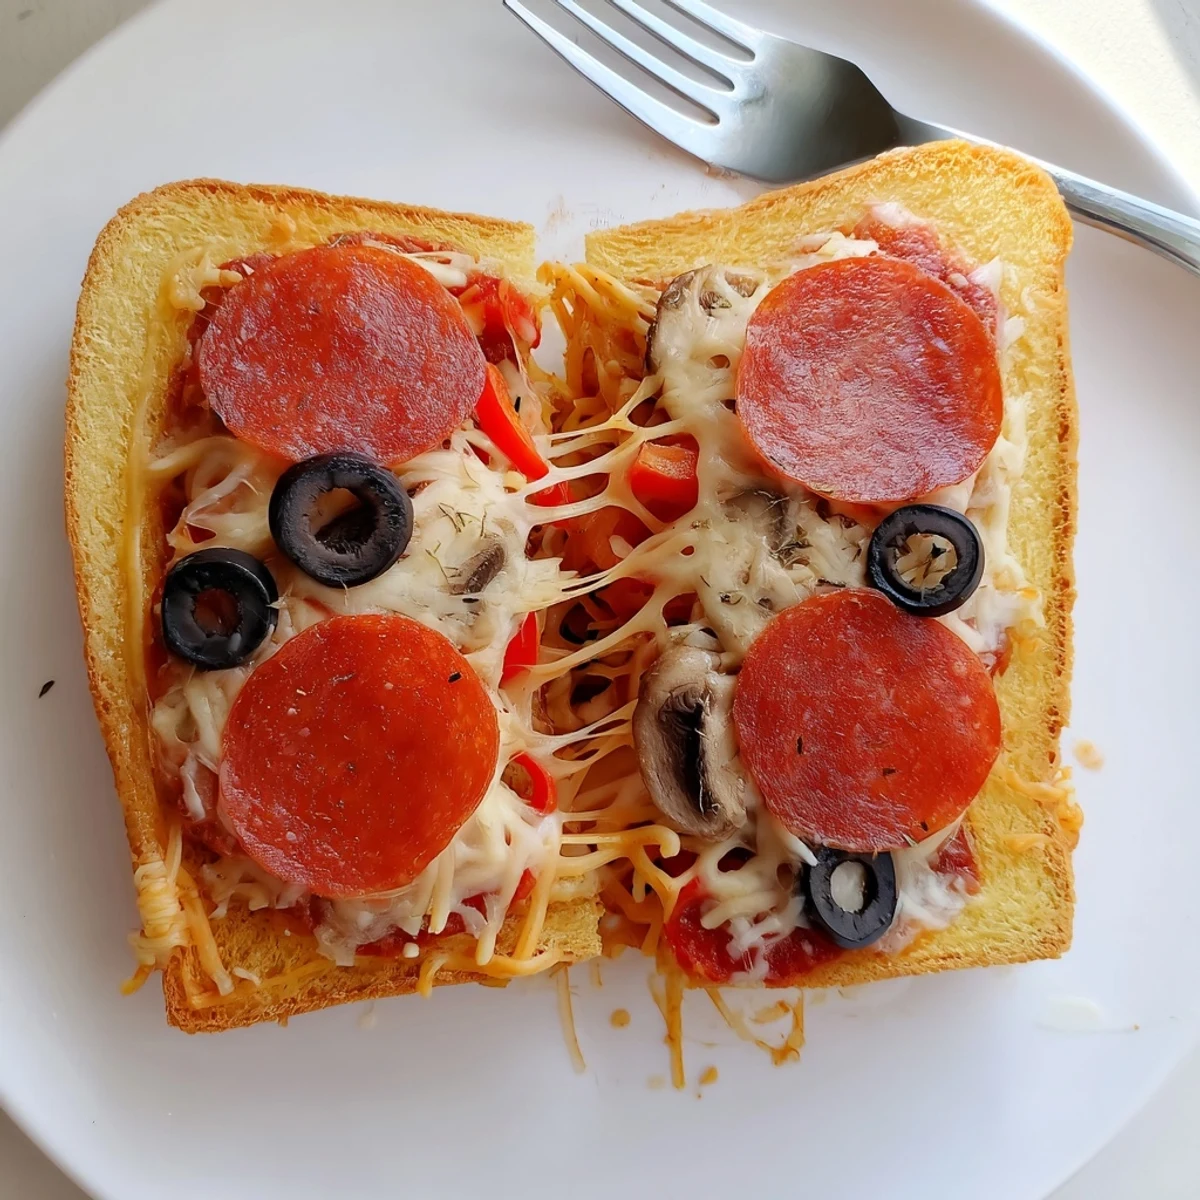
- Shredded mozzarella cheese: The secret to serious cheese pulls, as long as you don’t skimp—use a generous hand for maximum meltiness.
- Toppings: A little goes a long way, so thin slices of pepperoni, olives, peppers, or mushrooms make sure the pie iron closes easily and nothing falls out; dried Italian herbs give a finishing punch.
- Butter (for brushing): Brushing both sides makes the outside golden and irresistibly crisp—I melt mine right on a corner of the grate for easy access.
Instructions
- Warm the pie iron:
- Hold the pie iron over glowing campfire embers or set it on a stovetop for a couple of minutes; it should feel hot but not scorching to the touch.
- Prep the bread:
- Butter one side of each bread slice, then line up four slices buttered-side down on a clean surface—it’s a bit messy, but that’s part of the fun.
- Spread and layer:
- Spoon pizza sauce over the unbuttered sides of the bread, scatter a generous amount of mozzarella, and pile on your chosen toppings; finish with a pinch of Italian herbs if you love that pizzeria aroma.
- Seal the sandwiches:
- Lay the remaining bread on top, buttered-side up, pressing the edges lightly so they stick together before the next step.
- Toast in the pie iron:
- Set each sandwich in the preheated pie iron, clamp it shut, and trim off any overhanging bread for a neat seal—watch out, it’s hot.
- Cook over the fire:
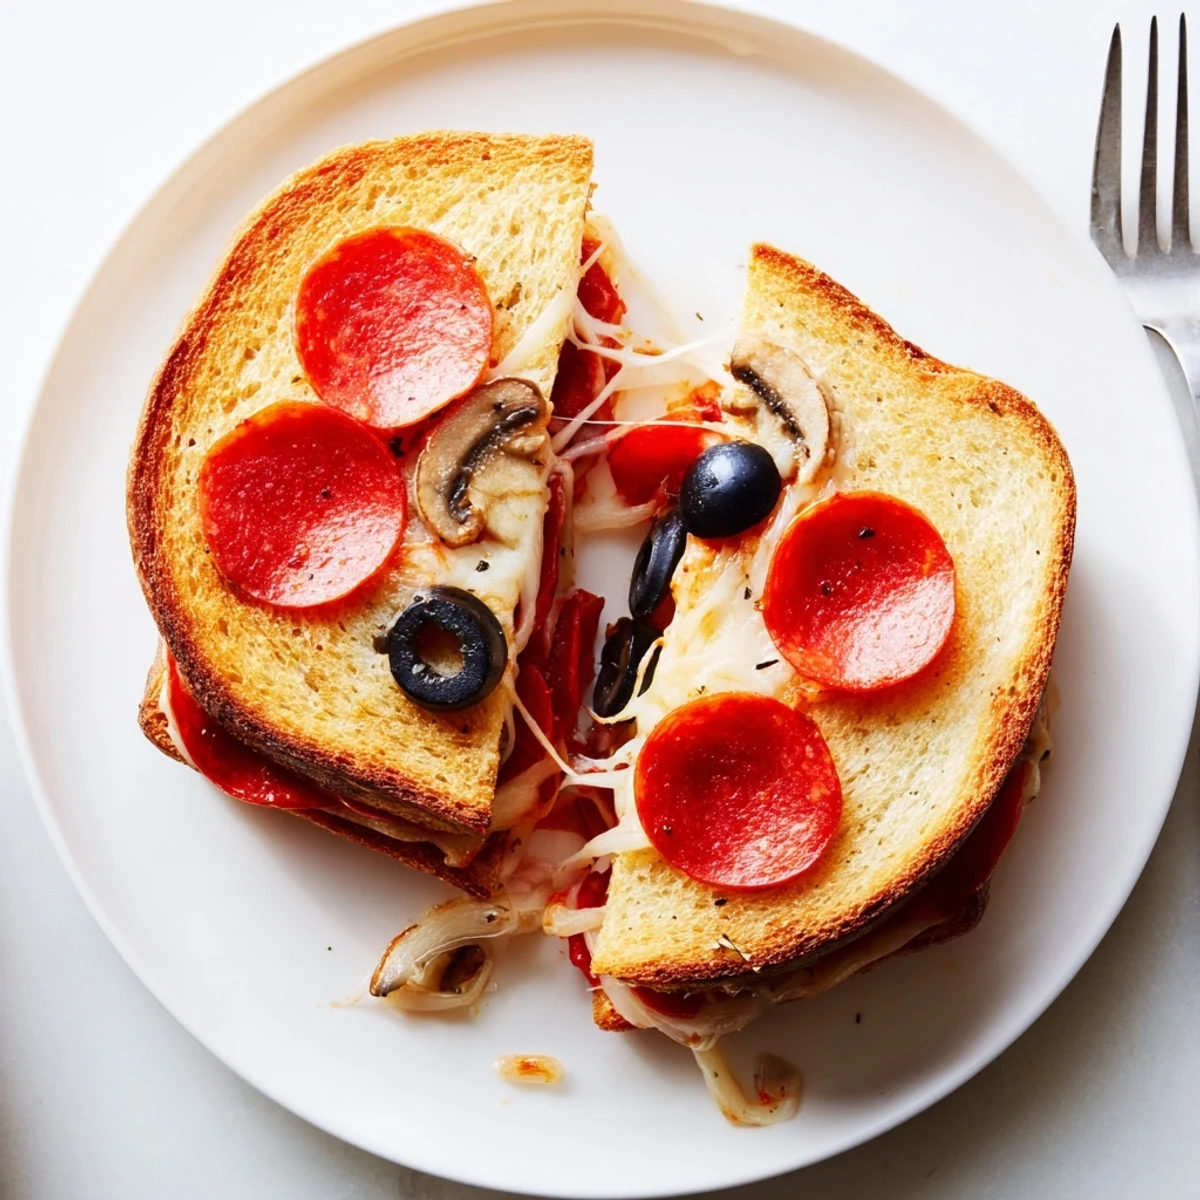
- Rest the closed iron over medium heat, flipping every 3-4 minutes; you’ll hear and smell when the bread begins to turn golden and the cheese inside starts to bubble.
- Unmold and serve:
- Open carefully—the pockets will be piping hot—and let them cool for a minute before digging in to avoid burning your mouth on molten cheese.
 Save
Save There was an afternoon when a sudden summer downpour forced us under the porch roof, and everyone insisted we keep making pizza pockets despite the drizzle. Something about hearing the rain while biting into crispy, melty sandwiches made a lasting impression, and the memory of laughter echoing through that meal still makes me smile.
Pie Iron Success Stories from the Backyard
I used to worry about getting even browning until a friend suggested rotating the pie iron once or twice during cooking. Now every pizza pocket has that perfect, uniform crunch, so nobody claims the 'burnt one' anymore. It’s all about paying attention to the smell—once the buttered bread begins to smell nutty, it’s time to check.
Switch Up Your Pizza Pocket Fillings
Don’t be afraid to think beyond classic pizza flavors; pesto, leftover roasted veggies, or even a swipe of barbecue sauce can totally change the vibe. One weekend, we tried ham and pineapple, and to my surprise, it disappeared faster than the pepperoni. If you have vegan or gluten-free friends, there are great substitutes that work beautifully—everyone gets to join the fun.
Making It Work With Kids (Or Campers of All Ages)
Handing out bowls of toppings and letting everyone assemble their own is half the adventure. The trickiest part for younger helpers is making sure the pie iron isn’t too hot—so I always keep tongs nearby for turning. Somehow, the mess is part of the charm, especially when someone inevitably tries to sneak 'just a little more cheese.'
- Pre-measure sauce into small cups to avoid spills.
- Keep a damp towel handy for cleaning sticky hands.
- Let the pockets cool at least a minute before serving—seriously, they’re like edible lava at first.
 Save
Save Pie iron pizza pockets will turn anyone into a happy camper, even if the 'campfire' is your backyard grill. May every bite be warm, gooey, and just a little bit smoky.
Recipe FAQs
- → What heat level works best for the pie iron?
-
Use medium heat so the bread browns evenly while giving the cheese time to melt. Too high a flame will burn the exterior before the center warms through; 3–4 minutes per side over moderate coals is a good target.
- → How do I prevent a soggy pocket?
-
Pat wet toppings dry and avoid overloading with sauce. Spread a thin layer of sauce and opt for pre-cooked or well-drained fillings to keep the bread crisp and the interior melted rather than soggy.
- → Can I use different breads or dietary alternatives?
-
Yes — whole wheat, gluten-free, or sturdy artisanal slices all work. Thinner breads cook quickly and may need less time; adjust heat and watch for a golden exterior to gauge doneness.
- → How should I assemble to get a good seal?
-
Butter the outer sides of each bread slice, place sauce and cheese on the interior, then top and press edges into the pie iron. Trim any exposed crust before closing to create a tight seal and prevent leaks.
- → What are good topping variations?
-
Try pepperoni or salami, cooked sausage, sautéed mushrooms, bell peppers, black olives, or fresh basil. Swap marinara for pesto for a different flavor profile.
- → How do I safely remove pockets from the pie iron?
-
Use heat-resistant tongs and let the pockets rest a minute after removing from direct heat. Open the iron carefully away from your face to avoid steam and check the temperature before serving.