 Save
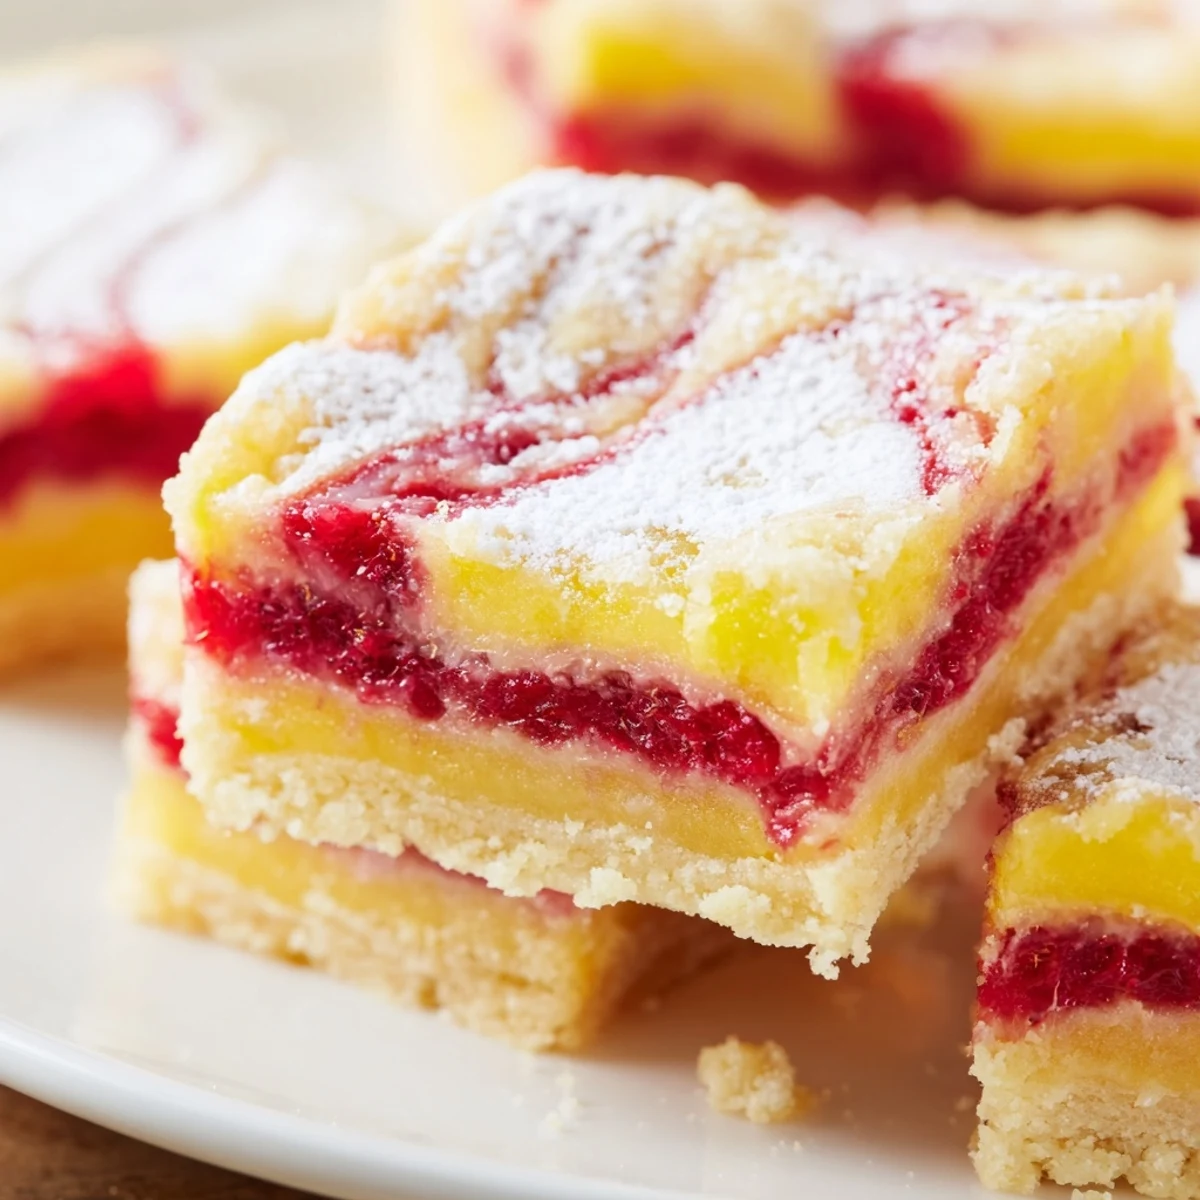
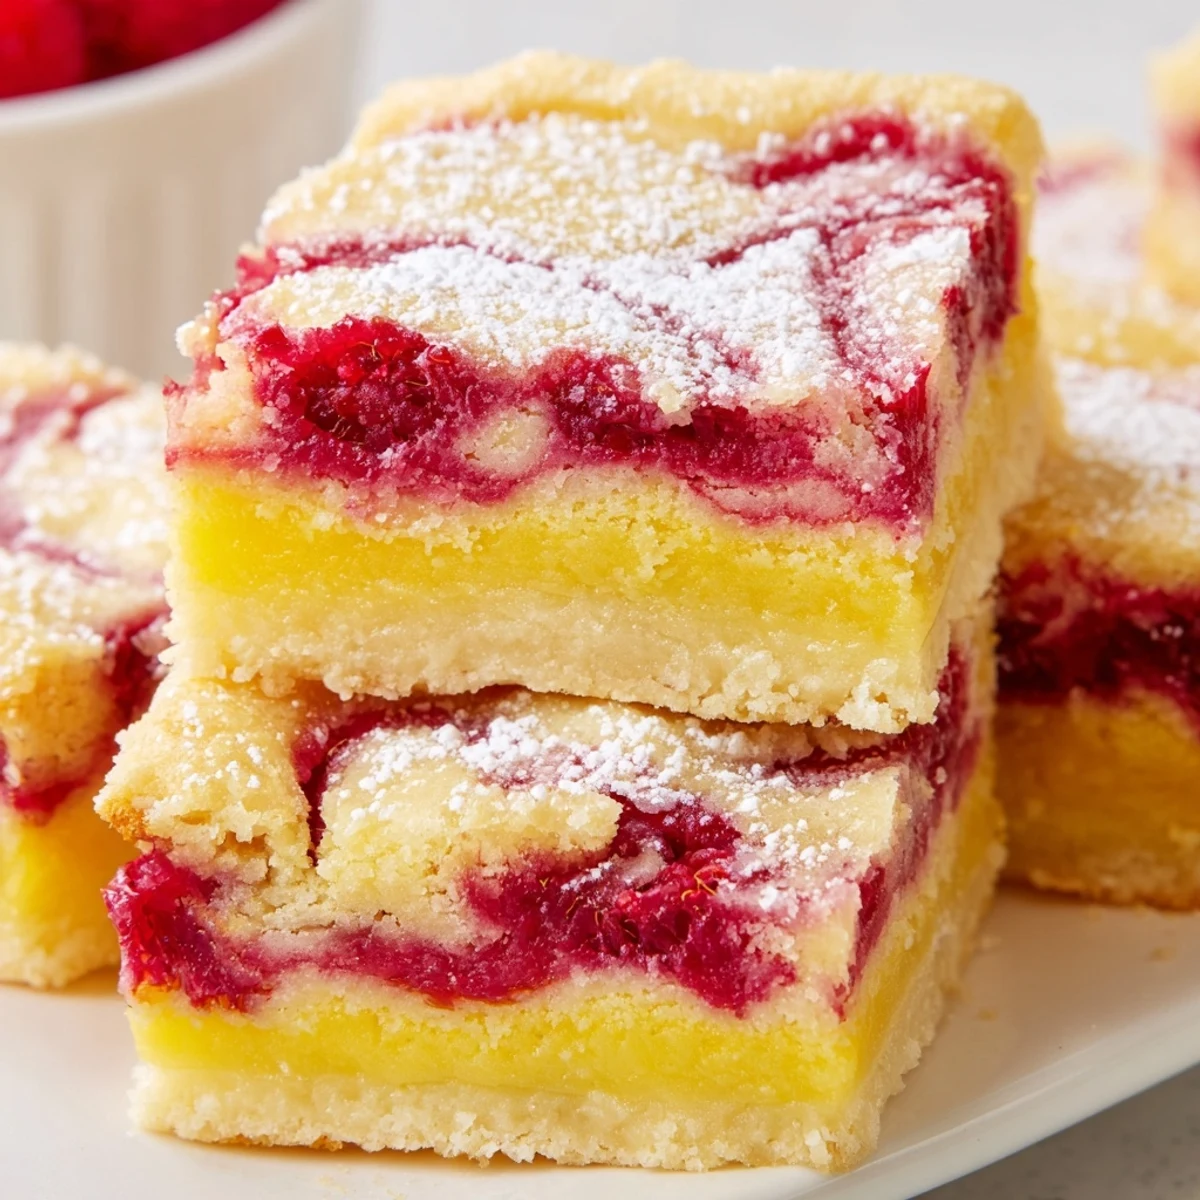
Save These stunning bars combine a buttery shortbread base with tangy lemon curd and a vibrant raspberry swirl. The result is a beautiful marbled dessert that balances sweet and tart flavors perfectly. After baking, the bars need time to chill completely before slicing—this ensures clean edges and the perfect texture. The technique involves swirling fresh raspberry sauce into the lemon filling, creating an eye-catching pattern that makes these treats ideal for special occasions or afternoon tea.
The first time I made these bars, my kitchen smelled like sunshine and berries collided. I was experimenting with what to do with an abundance of raspberries from the farmers market and leftover lemons from a failed lemonade stand attempt with my niece. The way the bright pink swirl looks against the golden yellow filling still makes me pause every single time I pull them from the oven.
Last summer, I brought these to a rooftop dinner party and watched them disappear in under ten minutes. My friend Sarah, who claims she hates lemon desserts, ate three and demanded the recipe on the spot. Something about the combination of textures and flavors makes people assume they are from an expensive bakery.
Ingredients
- 1 cup all-purpose flour: The foundation of your shortbread crust, dont pack it down when measuring
- 1/4 cup powdered sugar: Creates a tender, delicate crumb in the crust that regular sugar cannot achieve
- 1/4 tsp salt: Balances the sweetness and makes all the flavors pop
- 1/2 cup cold unsalted butter, cubed: Must be cold straight from the fridge, this creates those irresistible flaky layers
- 1 cup granulated sugar: Sweetens the lemon filling without overpowering the citrus
- 2 large eggs: Room temperature eggs will incorporate more smoothly into the filling
- 1/4 cup all-purpose flour: Just enough to set the lemon layer without making it cakey
- 1/2 cup freshly squeezed lemon juice: Bottled juice will give you a flat flavor, fresh is absolutely worth the effort
- 1 tbsp lemon zest: This is where the bright lemon perfume really comes from
- 1/4 tsp salt: A pinch in the filling enhances the lemon intensity
- 1/2 cup fresh raspberries: Frozen will work in a pinch but fresh give you that vibrant ruby color
- 2 tbsp granulated sugar: Sweetens the raspberries just enough to temper their natural tartness
- 1 tsp lemon juice: Brightens the raspberry sauce and helps it thicken nicely
Instructions
- Prepare the foundation:
- Preheat your oven to 350°F and line an 8x8-inch pan with parchment paper, letting the paper hang over the sides like little handles.
- Build the shortbread crust:
- Mix flour, powdered sugar, and salt in a medium bowl, then cut in that cold butter until the mixture looks like coarse crumbs.
- Press and par-bake:
- Press the crumbly dough evenly into your prepared pan and bake for 18 to 20 minutes until it turns a light golden color.
- Make the raspberry magic:
- Mash those raspberries with sugar and lemon juice in a small saucepan, warming them for about 4 minutes until they break down into a gorgeous sauce.
- Strain and set aside:
- Push the raspberry mixture through a fine mesh sieve to catch all the seeds, leaving you with silky smooth swirl sauce.
- Whisk the lemon filling:
- In a separate bowl, whisk granulated sugar and eggs until smooth, then add flour, lemon juice, zest, and salt until fully combined.
- Layer and swirl:
- Pour the lemon filling over your warm crust, then drop spoonfuls of raspberry sauce across the top and swirl gently with a toothpick.
- Bake until set:
- Return to the oven for 20 to 22 minutes until the center is just set and no longer jiggles when you give the pan a gentle shake.
- The patience part:
- Cool completely in the pan, then chill for at least 2 hours before slicing into clean squares.
 Save
Save These bars have become my go-to for bringing to new neighbors or as a thank-you gift. Something about the homemade effort combined with the stunning presentation makes people feel truly special.
Making Them Ahead
I have learned that these bars actually improve with a day in the refrigerator. The flavors meld together and the texture becomes even more refined, which makes them perfect for preparing the day before a party or gathering.
Swirl Technique Secrets
After many attempts, I have found that less swirling is actually more effective. Just one or two gentle passes with your knife creates that beautiful marbled effect without over-mixing the colors into a muddy pink.
Serving Suggestions
These bars shine brightest when served slightly chilled alongside a cup of black tea or a glass of cold Prosecco. The contrast between the tart dessert and a complementary beverage really elevates the experience.
- Dust with powdered sugar right before serving for that bakery finish
- Cut them with a clean knife wiped between slices for pristine edges
- Store them in the refrigerator, where they will keep beautifully for up to four days
 Save
Save Every time I serve these, someone asks if they are difficult to make, which is the best compliment. Only we need to know how simple they actually are to create.
Recipe FAQs
- → How long should I chill the bars before cutting?
-
Refrigerate for at least 2 hours, or until completely set. Overnight chilling produces even cleaner slices and improves the texture.
- → Can I use frozen raspberries instead of fresh?
-
Yes, thaw frozen raspberries first and drain excess liquid. The swirl might be slightly thinner but will still create a beautiful marbled effect.
- → Why do I need to strain the raspberry sauce?
-
Straining removes seeds for a smooth, elegant swirl texture. This ensures clean marbling without gritty bits interrupting the silky lemon filling.
- → How do I know when the bars are done baking?
-
The center should be just set with no jiggle when you gently shake the pan. The edges might be slightly golden, but avoid overbaking or the texture becomes tough.
- → Can I make these ahead of time?
-
These bars actually improve after a day in the refrigerator. The flavors meld together beautifully. Store covered in the fridge for up to 3 days before serving.
- → What's the best way to get clean slices?
-
Use a sharp knife and wipe it clean between each cut. Chilling thoroughly and even freezing for 30 minutes before slicing helps achieve perfect edges.