 Save
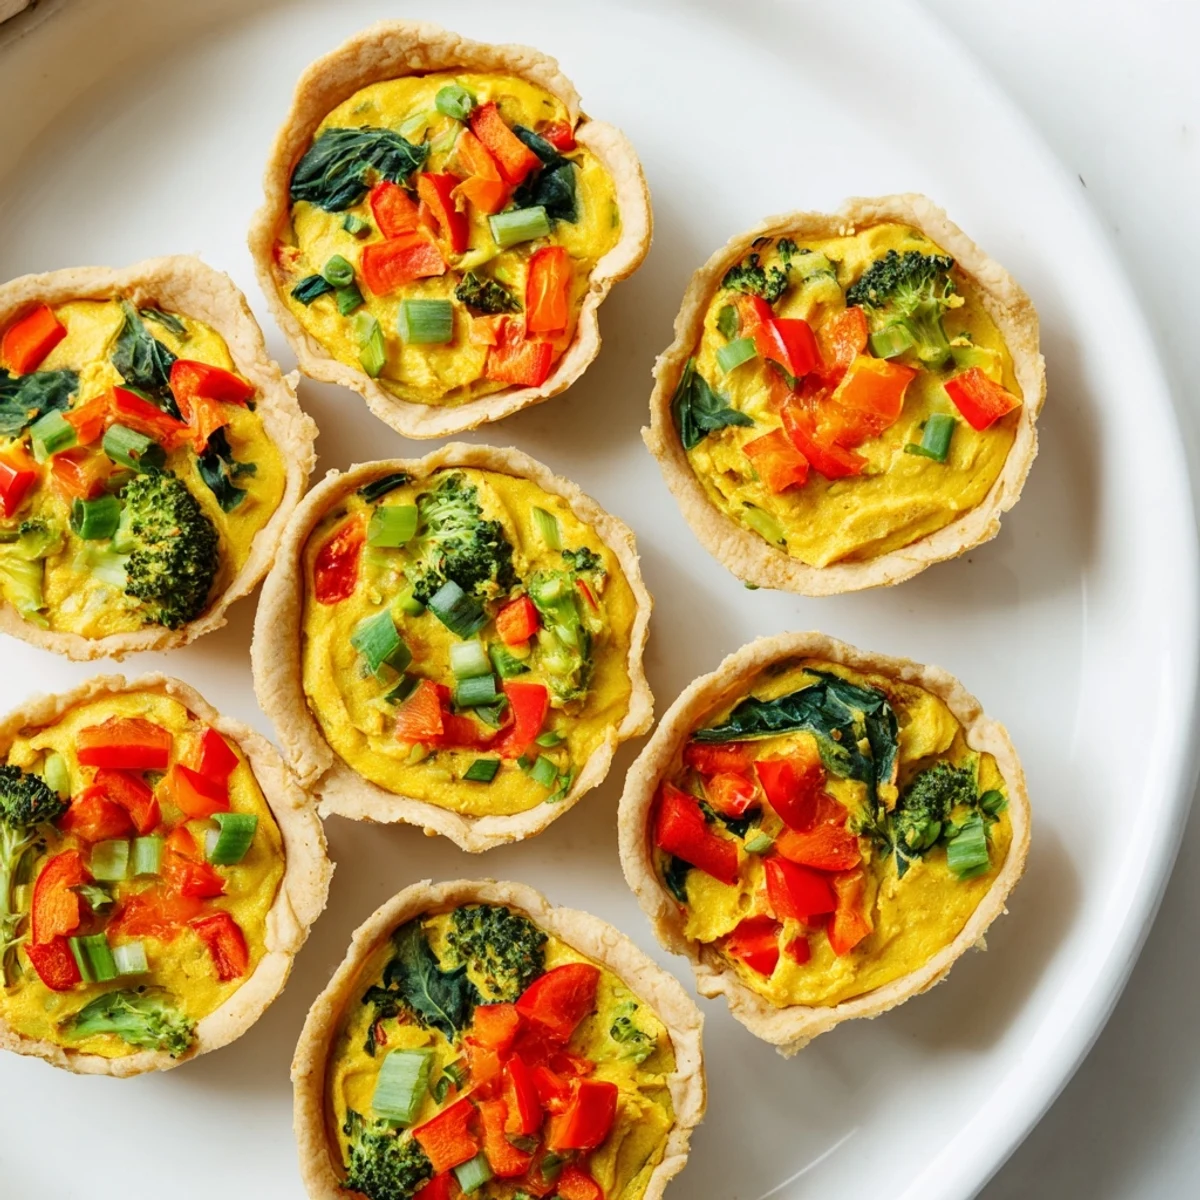
Save These delightful mini quiches combine a tender, flaky crust with a silky chickpea flour custard that rivals traditional egg-based fillings. The chickpea flour creates a protein-rich base that sets beautifully while remaining creamy and tender inside.
Colorful vegetables including red bell pepper, spinach, green onions, and broccoli add vibrant flavor and nutrition throughout. Each bite delivers a perfect balance of crisp pastry and smooth, savory filling with subtle notes of garlic and onion.
Ready in just 50 minutes with simple preparation, these make excellent finger food for brunch buffets, cocktail parties, or packed lunches. They reheat beautifully and taste delicious warm or at room temperature, making them ideal for advance preparation.
The first time I made vegan quiche, my mother-in-law took three helpings before asking what kind of cheese I used. Watching her face light up when I told her it was chickpea flour is one of my favorite kitchen memories. These little quiches have become my secret weapon for brunch gatherings, disappearing faster than I can get them onto the serving platter.
Last spring, I made these for a baby shower and watched a skeptical uncle declare them better than any traditional quiche he had tasted. The way the turmeric gives the filling that golden egg-like color still makes me smile every time they come out of the oven. Now they are the first thing friends request when I offer to bring appetizers.
Ingredients
- All-purpose flour: Forms the tender base of our crust, creating that perfect flaky texture
- Vegan butter: Cold and cubed is absolutely essential here for achieving a crisp, golden crust
- Chickpea flour: The magical ingredient that transforms into a creamy, protein-rich custard
- Plant milk: Soy or almond work best to create a smooth, pourable consistency
- Nutritional yeast: Adds that savory, cheesy depth we all crave in quiche
- Turmeric: Provides the most beautiful golden color reminiscent of traditional egg quiches
- Red bell pepper: Brings sweetness and vibrant color to every bite
- Spinach: Wilts down beautifully and adds lovely green pockets throughout
- Broccoli florets: Provide texture and hearty substance to the filling
Instructions
- Prepare your crust:
- Combine flour and salt in a bowl, then work in cold vegan butter until you see coarse crumbs. Add ice water one tablespoon at a time until the dough comes together. Press into your muffin cups and dock the bottoms with a fork to prevent bubbling.
- Par-bake the shells:
- Bake at 375°F for 8 minutes until just set. This step ensures your crust stays crisp even after adding the moist filling.
- Whisk the silky filling:
- In a large bowl, combine chickpea flour, plant milk, nutritional yeast, turmeric, and spices. Whisk until completely smooth, taking your time to eliminate any lumps.
- Sauté your vegetables:
- Heat olive oil in a skillet over medium heat. Cook bell pepper for 2 minutes, add spinach until wilted, then stir in green onions and broccoli for one more minute.
- Combine and fill:
- Fold your cooked vegetables into the chickpea mixture. Divide the filling evenly among your pre-baked crusts, filling each cup almost to the top.
- Bake to golden perfection:
- Bake for 22 to 25 minutes until the centers are completely set and lightly golden on top. They should feel firm when gently touched.
- Cool and serve:
- Let them rest in the pan for 10 minutes before removing. This cooling time is crucial for the filling to set properly.
 Save
Save These quiches have saved me so many times when I need to bring something substantial to gatherings but want to keep it simple. Seeing people light up when they take that first bite never gets old.
Making Them Ahead
I often make a double batch on Sunday and freeze half for emergency appetizers. They reheat beautifully in a 350°F oven for about 10 minutes, tasting just as fresh as the day they were made.
Customizing Your Vegetables
The beauty of this recipe is how adaptable it is to whatever you have in your crisper drawer. Just keep the total vegetable amount the same and you will end up with perfectly set quiches every time.
Serving Suggestions
These are substantial enough to serve as a light lunch alongside a simple green salad. I have also served them as part of a brunch spread with fresh fruit and roasted potatoes.
- Try them with a dollop of vegan sour cream
- Fresh herbs like chives or parsley add a lovely finish
- A light drizzle of olive oil right before serving enhances the flavors
 Save
Save These little quiches have become my go-to for showing just how delicious and satisfying plant-based eating can be. Hope they become a staple in your kitchen too.
Recipe FAQs
- → What makes the filling creamy without eggs?
-
Chickpea flour combined with plant milk creates a smooth, protein-rich custard that sets beautifully during baking. The flour gelatinizes when cooked, producing a creamy texture that mimics traditional egg-based quiche fillings while remaining completely plant-based.
- → Can I make these gluten-free?
-
Absolutely. Substitute the all-purpose flour with a 1:1 gluten-free flour blend for the crust, or create crustless versions by baking the filling directly in greased muffin cups. Both methods yield delicious results suitable for gluten-free diets.
- → How long do these mini quiches keep?
-
Store cooled quiches in an airtight container in the refrigerator for up to 5 days. They reheat beautifully in the microwave for 30-45 seconds or in a 350°F oven for 8-10 minutes. They also taste excellent cold, making them perfect for grab-and-go meals.
- → What vegetables work best in the filling?
-
The combination of red bell pepper, spinach, green onions, and broccoli provides excellent texture and flavor. You can also try mushrooms, zucchini, sun-dried tomatoes, corn, or diced asparagus. Aim for about 1 to 1.5 cups total vegetables for optimal filling consistency.
- → Can I freeze these mini quiches?
-
Yes, these freeze exceptionally well. Once completely cooled, place them in a single layer on a baking sheet until frozen solid, then transfer to a freezer bag or container. They'll keep for up to 3 months. Reheat from frozen in a 350°F oven for 15-20 minutes.
- → Why do I need to pre-bake the crust?
-
Pre-baking, also called blind baking, ensures the bottom crust cooks through completely and stays crisp. Without this step, the moisture from the filling would make the crust soggy. Just 8 minutes creates a perfect foundation for the creamy vegetable filling.