 Save
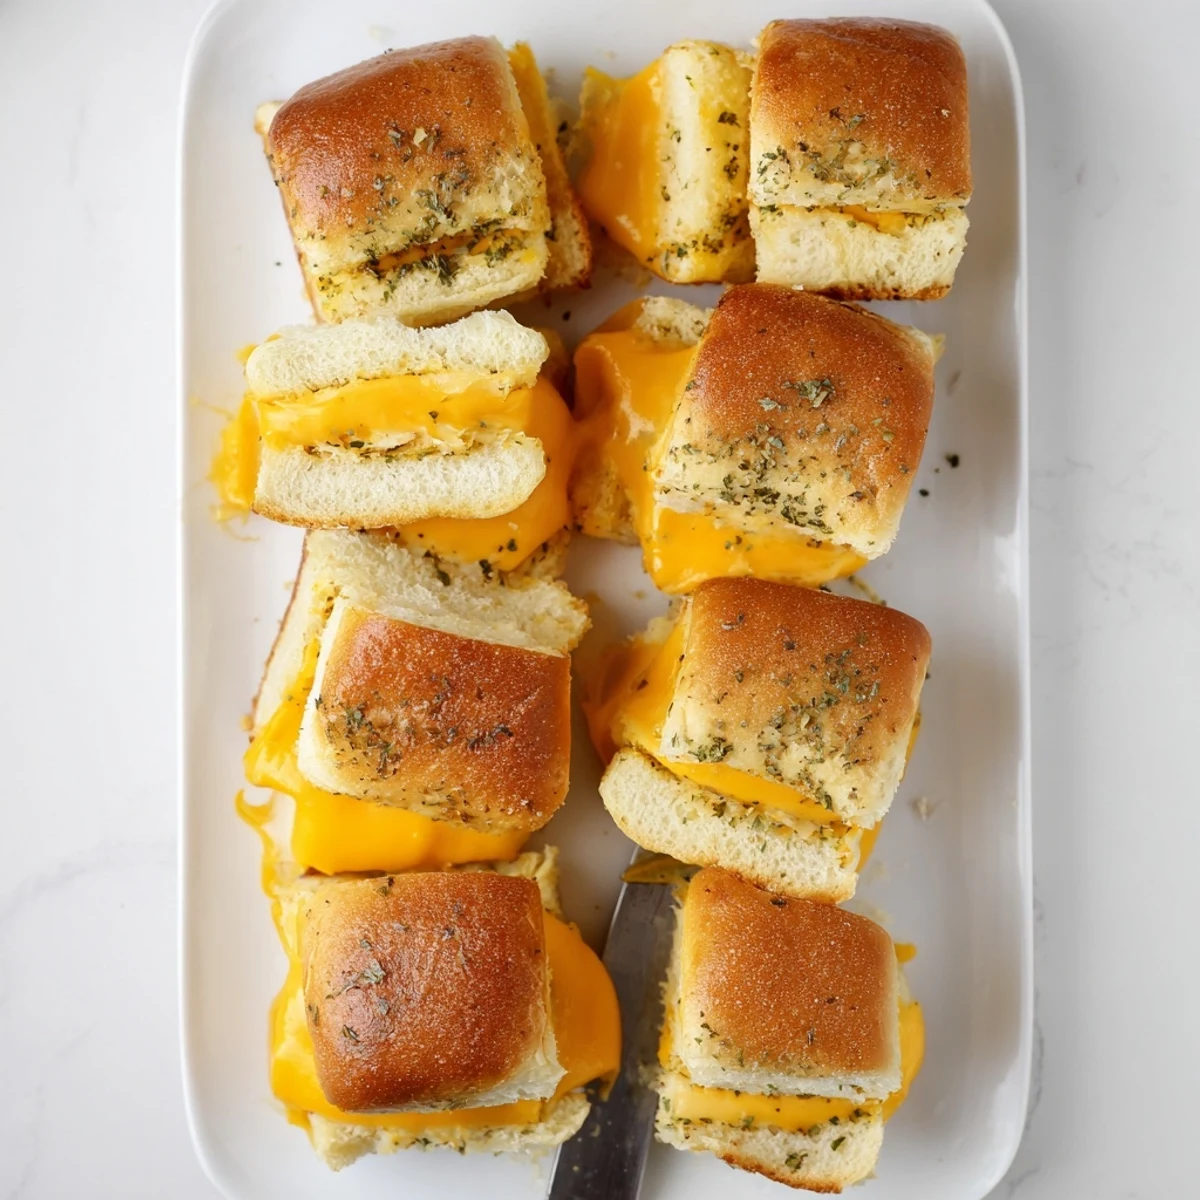
Save These irresistible Hawaiian roll sliders combine soft sweet bread with savory melted cheddar, all brushed with a seasoned garlic butter and baked until perfectly golden. The contrast between the slightly sweet rolls and salty cheese creates an addictive flavor profile that keeps everyone coming back for more.
Preparation takes just 10 minutes—simply slice the rolls, layer with cheese, and brush with the butter mixture before baking. The result is a tray of warm, gooey sandwiches that disappear quickly at any gathering. Customize with different cheeses or add ham for extra protein.
The first time I made these for a Super Bowl party, my friend Sarah literally hovered over the baking dish waiting for them to come out of the oven. Something about that sweet Hawaiian bread getting all buttery and golden makes people forget their manners in the best way possible.
Last winter my kids had three friends over unexpectedly after school, and I threw these together with whatever cheese I had in the fridge. They stood around the counter eating them straight off the baking sheet, too impatient to even sit down at the table. Sometimes the simplest food creates the best moments.
Ingredients
- 12 Hawaiian rolls: The sweetness is what makes these special and keeps everyone coming back for more
- 12 slices cheddar cheese: Sharp cheddar cuts through the sweet bread beautifully but any melting cheese works
- 4 tablespoons unsalted butter, melted: Get this good and melted so it brushes on evenly and soaks into the bread
- 1 teaspoon garlic powder: This little punch of savory flavor balances all the sweetness perfectly
- 1 teaspoon dried parsley: Adds a nice pop of color and subtle freshness
- 1/4 teaspoon salt: Just enough to bring everything together without overpowering
Instructions
- Get your oven ready:
- Preheat to 350°F so you are not waiting around once everything is assembled
- Prep the rolls:
- Slice them all in half horizontally but keep them connected in their little rows, like they are still holding hands
- Start building:
- Lay the bottom halves in your baking dish and top each one with a slice of cheese
- Close them up:
- Place the tops back on and try to match them up with their original bottoms
- Make the magic butter:
- Whisk together melted butter, garlic powder, parsley, and salt until well combined
- Brush generously:
- Coat the tops of all the rolls with your butter mixture and do not be shy about it
- Bake until golden:
- Pop them in for 12 to 15 minutes until the cheese is melty and the tops are beautifully browned
- The hard part:
- Let them cool for just a couple minutes before cutting them apart and serving warm
 Save
Save My mom started making a version of these when I was in college, and they became the thing I requested every time I came home to visit. Now when I smell that buttery garlic aroma wafting through the kitchen, I am instantly transported back to her tiny apartment kitchen, stealing one off the counter before dinner was even ready.
Make Them Your Own
Sometimes I tuck thin tomato slices between the cheese layers for a little acidity and fresh flavor. A slice of ham or turkey transforms them into mini sliders that feel more substantial. The basic formula is so forgiving that almost anything works.
Cheese Options
While sharp cheddar is my go to for that classic flavor profile, mixing in some mozzarella makes them extra gooey. Swiss adds a lovely nutty note, and pepper jack brings just enough heat to make things interesting without overwhelming the sweetness of the rolls.
Serving Ideas
These are the ultimate party food because they are easy to grab and eat while mingling. I have also served them alongside a big bowl of tomato soup for a fun twist on the classic grilled cheese combo. They reheat surprisingly well the next day too.
- Double the recipe for crowds because they disappear fast
- Set out some extra napkins because the cheese gets gloriously messy
- Consider a small bowl of warmed marinara for dipping on the side
 Save
Save There is something about pulling these apart while they are still warm that just feels like home, no matter whose house you are in.
Recipe FAQs
- → Can I make these ahead of time?
-
Yes, assemble the sliders up to 24 hours in advance and refrigerate. Add the garlic butter just before baking for the crispiest tops.
- → What cheese works best?
-
Sharp cheddar provides excellent flavor, but provolone, Swiss, mozzarella, or a blend all melt beautifully and create that irresistible gooey texture.
- → How do I store leftovers?
-
Store cooled sliders in an airtight container for up to 3 days. Reheat in a 350°F oven for 5-7 minutes to restore crispiness and melt the cheese again.
- → Can I add meat?
-
Absolutely. Thinly sliced ham, turkey, or cooked bacon between the cheese layers transforms these into hearty mini sandwiches perfect for game day or lunch.
- → Why keep the rolls connected?
-
Baking the rolls together helps them retain moisture and makes assembly faster. Cut into individual sliders after baking for easy serving.